Berkey Water Filter Assembly | How To Setup Your Berkey Filter Start To Finish
If you’re a visual learner like me, these detailed step by step instructions with a video on how to assemble your Berkey water filter from start to finish are for you!

This post contains affiliate links which means that I make a small commission at absolutely no extra cost to you. See my full, boring disclosure here.
Visual Learners Unite!
Putting together your new Berkey filter really isn’t difficult, but if you’re anything like me, visual aids are so much more useful than written directions. The quickest way to confuse me is written directions with no pictures. It’s definitely not the way I learn best!
That’s why I’m breaking it down for you step by step and we’ll get it all put together in no time!
Still In Water Filter Research Mode?
Buying a water filter can be a huge step for your family if you’re on the journey to a healthier and less toxic lifestyle.
If you’re in research mode and haven’t quite decided if the Berkey is the right water filter for you and your family, be sure and check out my full review of our filter plus the pros and cons of a Berkey water filter. We took the plunge and haven’t regretted it a single minute!
>>Berkey Water Filter Pros and Cons | BERKEY FILTER REVIEW<<<
Let’s jump right in to how to put your new Berkey filter together!
How To Assemble The Berkey Water Filter
1. Starting from the bottom, place the black rubber ring on the bottom of the lower Berkey chamber.
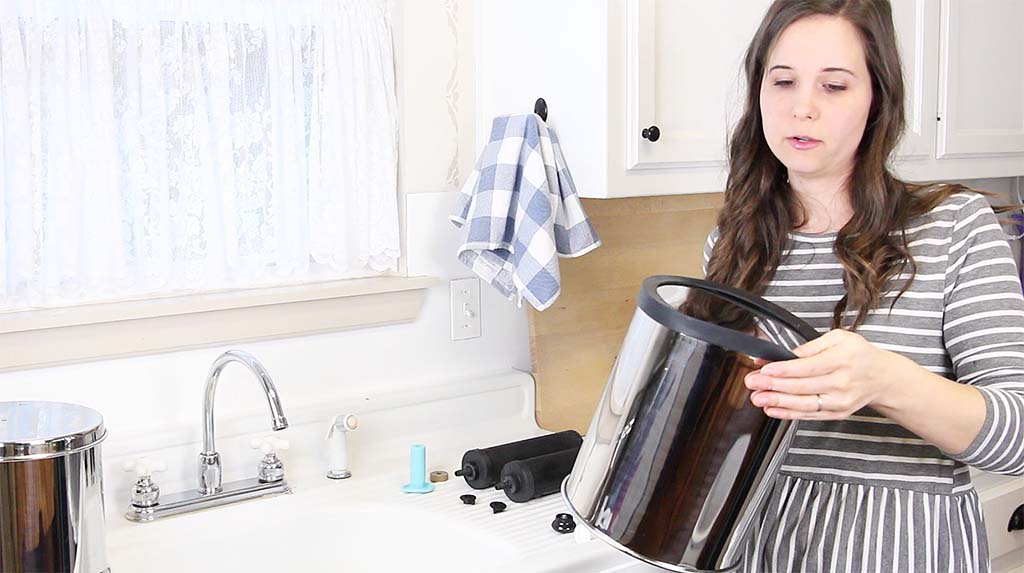
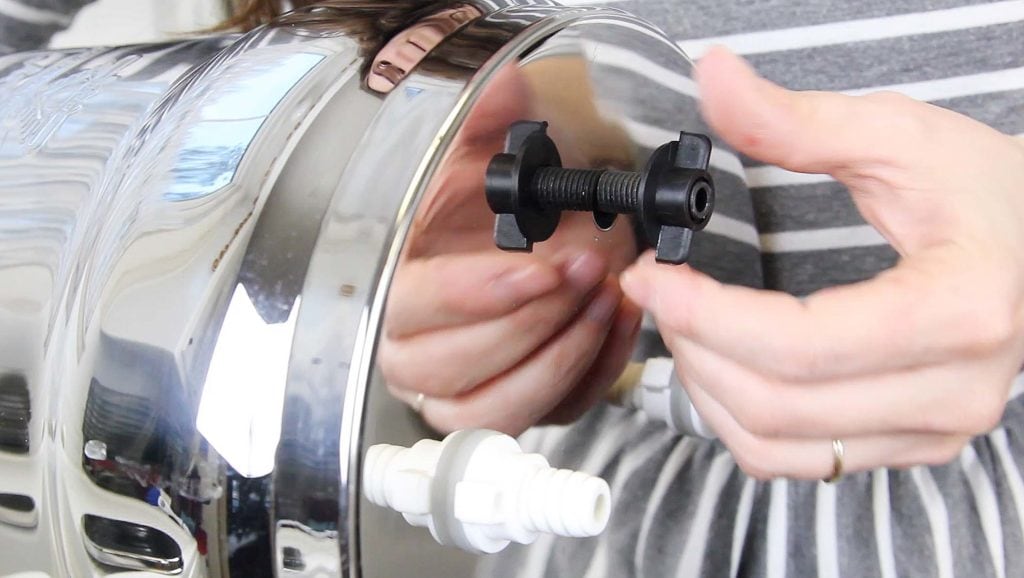
2. Install your spigot. See the video for detailed instructions for both the plastic and the stainless steel spigot.

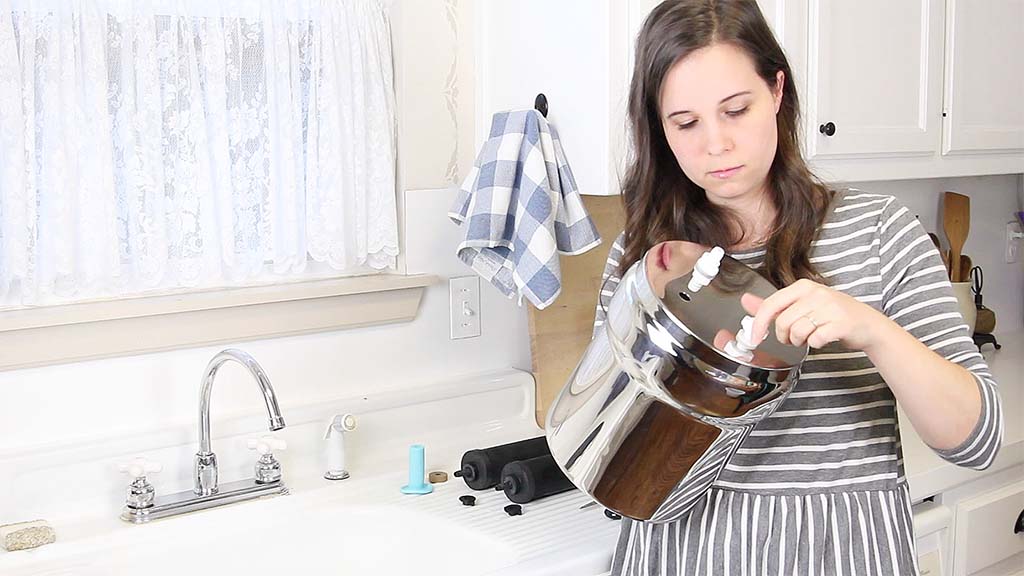
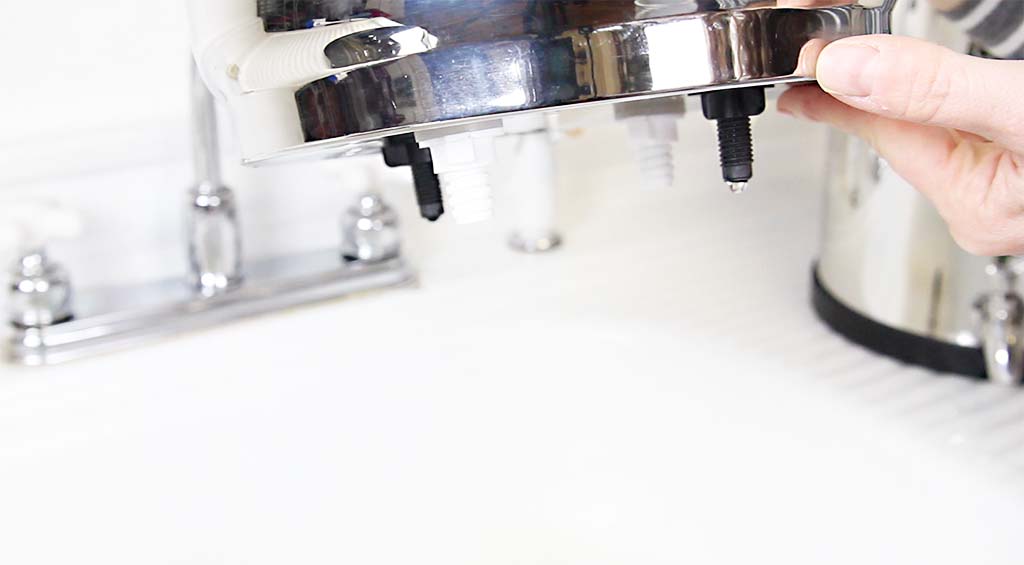
3. Install your filter elements onto the top berkey chamber. They are installed what appears to be upside down so sticking up inside the upper chamber. Place the large sealing washer onto the threaded stem of the element. Place the filter element down into one of the holes inside the top chamber. Secure the filter into place by screwing the nut onto the stem from the outside bottom of the chamber. Repeat with desired amount of filters.
4. If you have holes remaining without filters in them, plug the extra holes with the provided plugs. Blocking plugs may vary. For the solid rubber plugs: insert them tightly into the holes. For the white blocking plugs, screw them into the empty holes until tight.
5. Run some water into your top chamber and make sure your filters and plugs are installed correctly and no water is leaking from where it shouldn’t be. Place the upper chamber onto the lower chamber.
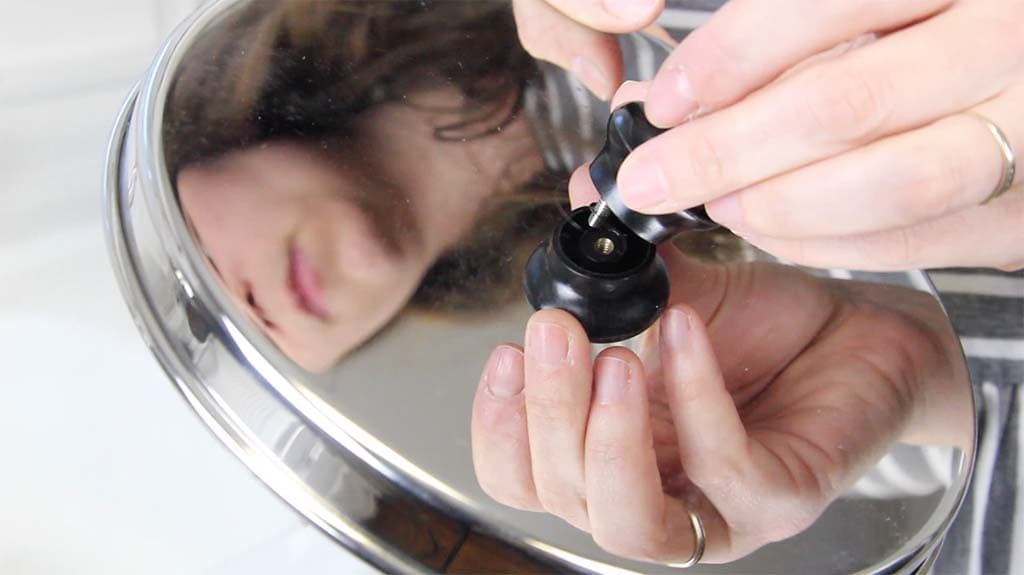
6. Install the knob on the lid. Take care when unscrewing the small screw from the knob not to lose the tiny washer. Hold the knob over the hole one the flat side of the top. Place the tiny washer on the screw and screw the knob onto the top until tight. You can use a small screw driver to snug up the knob but be careful not to over tighten. You want it just tight enough not to turn.
That’s it! You’re now ready to fill your Berkey!
7. To add the optional fluoride filters: set your assembled Berkey top chamber upside down on the counter with the threaded ends of the black filter elements sticking up. You’re going to screw the fluoride filters straight onto the threaded ends of the black filters. Make sure the flow arrow on the fluoride filter is facing the correct way { it’ll be pointing to the ceiling if you have your upper chamber sitting upside down on the counter}. Make note of the label on the fluoride filter and screw it onto the black filter stem making 8 full rotations. More than 8 rotations could damage the filter so be sure to count full rotations as you screw the fluoride filter on! Flip the top chamber back over and place on the bottom chamber.
Berkey does recommend that you run the red food coloring test once you get your filters primed and put into your new Berkey. ONLY DO THE RED DYE TEST ON THE BLACK FILTER ELEMENTS, NEVER ON THE FLUORIDE FILTERS!
Quick Berkey Links:
More Posts You May Like:
Berkey Water Filter Pros and Cons | BERKEY FILTER REVIEW
HOW TO PRIME BERKEY FILTERS | Black Filters and Fluoride Filters
Homestead Gift Guide | Homestead And Farm Essentials
SAVE TO YOUR FAVORITE CLEAN LIVING BOARD:

Thank you so much for stopping by today. It means the world to have you here in my little corner of the internet world! Be sure to check out my YouTube channel to see my content in video format and as always, you can find me over on Instagram as well.
Enjoy your clean, health promoting Berkey water!